Sunday, September 30, 2012

Lesson 3: Master Shutter Speed


I think I went a bit photo crazy with examples of how to use shutter speed for this assignment...


       Longer shutter speeds are ideally used in low light situations which allows the the sensor to collect light when the aperture isn't enough to create a correct exposure.  Its also used to show motion like the ones shown in my photos above.  When using a longer shutter speed you want to make sure you're using a sturdy tripod or else your photos will be blurred.
       In real life situations, long shutter speeds are ideal for shooting the stars or painting with light, or taking nighttime scenic photo's.  Slower shutter speeds allow photographers to get very creative with their shots.   The photos below show my previous attempts at 'painting with light,' and also shooting the stars.  Shooting the stars can be very difficult;  In this shot I was using a very flimsy tripod which allowed just the smallest bit of wind to blur my photo.  If you don't recognize it, thats Orion's belt.  My personal favorite star constellation.  I've yet to clearly photograph the stars the way I'd like.  Below that is an example of what a slow shutter speed can do when photographing a waterfall.  Again a tripod is a necessity in shots such as these.  Or if you don't have one on you, do what I did: Use a rock. =]


In real life situations, using a very fast shutter speed can be a huge benefit.  It can allow you to literally stop a moment as it's in motion.  In the photo shown below, I used a faster shutter speed to stop water as it was crashing onto rocks, or falling off of them.  Fast shutter speeds are most useful in sports, cars, animals, water...pretty much everything that moves.  Unlike stopping motion shots however, the shot below that of the moon is an example of using fast shutter speeds in low light situations.  See, because the moon is so bright, a slow shutter speed would only blow out its light creating a photo that looked like a giant football stadium beam.  The moon needs a fast shutter speed to expose correctly.


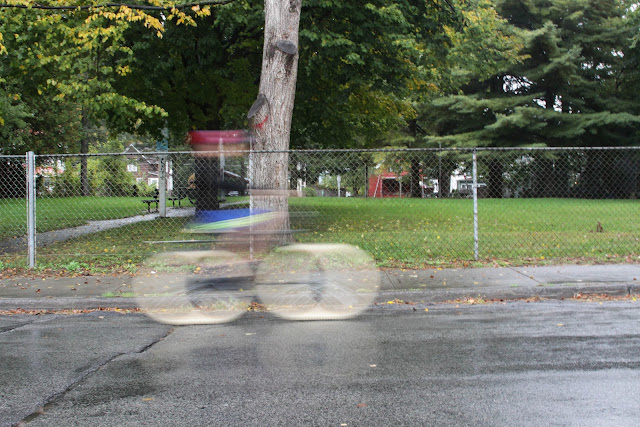
For this weeks assignment I wanted to play with light outside at night.  I have some leftover sparklers and even some colored flashlights, but if you live around the Saratoga area you know that it has been pouring rain day in and out for the past four days.  I'd really been meaning to head over to the Albany airport, set up my tripod and photograph the airplane trails as they leave the ground and head into the sky.  Even the rain would have made for some good examples of shutter speed if it had rained a bit harder during the day.  In any case for the assignment I photographed a bike rider, in the progression of faster shutter speeds to slower, until he's almost invisible.

f/3.5 at 1/125

f/5.6 at 1/60

f/8.0 at 1/30

f/13 at 1/13

f/20 at 1/5

f/22 at 0.5

Sunday, September 23, 2012

Lesson 2: Master Aperture

Photo number one before I did my set.  I liked this one the most but I wanted to effectively get all the ground details without moving the frame of my camera.


        Aperture can be a tricky thing to wrap your head around.  A few years ago a teacher I had made it really easy for me.  He took a group of us out to a football field, poked a small whole in a small sheet of aluminum and the told us to look through.  I didn’t quite understand how my vision acclimated to the distance but everything very far away became very clear.  To this day, when I think of aperture and depth of field, the first thing that comes to mind, is that tiny little pinhole in a sheet of aluminum.  When setting the aperture on your camera, the higher the number means the smaller of the hole that the shutter will expose to light.  The smaller the number means the larger the hole and the sensor (when using digital) will light more quickly.  This accounts for the fact that when you change aperture, the shutter speed must change also to provide a correct correlation for the exposure. 
         For this assignment I chose from a few different ideas of what to photograph. I would like to redo this week and take a day where all I did was photograph things and practice with aperture.  I can’t speak for anyone else but this week flew by so fast I felt like all at once this assignment was due, and I wished I had put more of myself into it.  I can’t say I’m exactly impressed with how my photo’s came out this week, but next weeks will be better and my shoot properly shows how depth of field can be created by the changing of aperture.  I find that in photography, the photo’s that strike me the most are the ones that really capture something in the foreground with the shallow depth of field.  I think it sort of forces the viewer to see what you see.  To interpret it the way you meant for it to be seen.  As with all photographs-isn’t the point to get others to see through your eyes?  To pull the beauty of a moment in your life and capture it the way you saw it as beautiful?  
         I suppose I’m getting off topic now, but the point is I have a habit of pulling out my macro 75-300mm lens and using it to show what I thought was striking by focusing on one thing and blurring out the rest of the world, leaving no guess as to what I’m trying to see.  However for this assignment I simply used my 28-135mm lens.  I took my Mamiya tlr camera outside for a walk, and photographed down at it in a progression of apertures from f22-f5.0.  As the photos go on it becomes clear that the concrete underneath the camera becomes more in focus as well as its straps.   You can more clearly see the way it works if you look immediately from the f22 photo to the f5.0.  I also kept my camera in the Av mode so that I only changed the aperture and my camera changed the shutter speed for me.  I hope you enjoy these and if not, I’ll promise to set the bar a little higher for myself in the next lesson. =] Thanks 


f/5.0 at 1/400sec

f/5.6 at 1/320sec

f/6.3 at 1/320sec

f/7.1 at 1/200sec

f/8.0 at 1/200sec

f/10 at 1/100sec

f/13 at 1/60sec

f/16 at 1/50sec
f/20 at 1/30

f/22 at 1/25


Saturday, September 8, 2012

Lesson 1: Master your Camera


I seem to have always been a Canon girl.  I can't quite remember when the preference began.  Maybe since I'd always seen a Canon in the hands of my mother or when I worked for a wedding photographer I got used to the way I was surrounded by the lenses, bodies and flashes and the way each felt familiar in my fingers.  All I know is the time one of my best friends bought her few thousand dollar Nikon, I felt like a foreigner staring at something that should have been easy to translate.

At this point in time I'm the owner of quite a few cameras.  Polaroids, old point and shoots, a very pretty twin lens reflex and countless others.  My main camera's however lay in my camera bag thats been pulled around so much it only has one latch.  Inside is an old Canon digital Rebel that was my first SLR, and then my Canon 50D.  The Rebel was amazing for me to learn on and experiment with.  As soon as I got my 50D however there was no comparison.

With the larger LCD display and the rotating quick dial to more easily set shutter speeds, it was simply more efficient and user-friendly.  As with the original Rebel though, the 50D's main mode dial is the same.  On the dial the Automatic mode is labeled with the little green rectangle.  The automatic setting forces the camera to think for itself and set everything to what it thinks it sees.  From aperture to shutter speed to ISO speed and whether or not it thinks a flash should be used.  This setting I think should only be for users who either have no time and are without enough experience to think quickly about which settings to use, or for users who don't really have a specific care as to whether their photos will have the desired effect that they're looking for.  If thats the case, I'd recommend a nicer point and shoot for those folks.

The P on the mode dial stands for Program which is basically one step up from Auto.  It automatically sets your cameras Aperture and Shutter Speed while leaving your flash and ISO speed for you to control.  This I'll revert to once in a while, seeing as I am in no way professional and I'm still not completely comfortable diving in when there's a chance its something I might miss.  I'll give the camera its credit for sometimes knowing more than I do.   The TV on the mode dial stands for Time Value and the cameras shutter priority in which case you set the cameras shutter speed and the camera will automatically set the aperture for you.  The Av setting stands for aperture value where the user can set the aperture setting and the camera will set the shutter speed for you.  The M stands for manual where the user controls all settings on the camera and is in complete control as to how they will take their photograph.  I try use M as often as I can so I can become more skilled at judging light for myself.  Its a good feeling to have taken a photograph and at the end of the day be able to say you constructed each and every part of it yourself, and be happy with the outcome.

To tell you the truth I have probably never touched the other side of the mode dial that includes the tiny picture icons of the face, the mountains, the flower, the running man, the person with the star behind them and the flash with a slash over it.  I know those same icons used to be on my tiny point and shoot and that they are pretty self explanatory.

The face icon is for portraits of people and the manual advises that you use that mode with a telephoto lens.  The mountain icon is for scenic landscape types of photos in which you'd probably want to invest in a wide-angle lens.  The flower icon is for macro shots and shooting small details and a macro lens is advisable.   The running man is for action shots used mostly in sports.  The person with the star behind them is for night shots where in general if you're not using flash you should use a tripod.  The icon of a flash with a slash is used in situations where flash is not allowed, for example museums or weddings. (Assuming you're not the photographer.)

Getting to know your camera and how you are going to use your camera is keystone if you want to become successful in photography.  There are still a million things I have yet to discover when it comes to what my camera is capable of.  Still after two years, we are becoming acquainted as if we just met.  I can only hope to keep learning more.